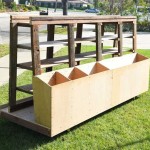
Maximizing storage space in a garage can be a challenge. With limited wall space and floor space, the best option is to utilize the often-ignored ceiling space. Creating a DIY garage ceiling storage system is an effective way to maximize vertical storage and keep your garage organized.
The first step in creating a DIY garage ceiling storage system is to measure the dimensions of the garage. Knowing the exact dimensions helps to ensure that the materials you purchase will fit in the garage. Additionally, you should measure the height of the ceiling, as this will determine the type of storage system you’ll need to create.
Once you have the measurements, you can begin shopping for the materials needed for your DIY garage ceiling storage system. The most essential materials are angled brackets, lag screws, and a sturdy plywood board. You’ll also need a drill and a saw to cut the board to size.
The next step is to install the brackets. Start by positioning the brackets on the ceiling and then securing them with lag screws. Make sure the brackets are secure and level before moving on to the next step.
Finally, you’ll need to attach the plywood board to the brackets. Once the board is in place, you can start adding shelves, hooks, and other storage elements to it. This will create an efficient and organized garage ceiling storage system that allows you to store items like tools, sporting equipment, and other items that would otherwise take up valuable floor or wall space.


Related Posts


