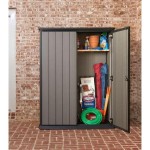
DIY Overhead Garage Storage Plans: Free and Functional Solutions
Maximizing storage space in a garage is a common challenge, especially for homeowners seeking to keep their vehicles and belongings organized. Overhead garage storage offers a practical solution, providing a significant amount of vertical storage space without encroaching on floor area. While pre-made overhead storage units can be expensive, resourceful DIYers can utilize free plans and readily available materials to construct custom solutions that perfectly fit their needs and budget. This article explores the benefits of DIY overhead garage storage, outlines key considerations for planning, and provides essential steps for successful construction.
Benefits of DIY Overhead Garage Storage
Building your own overhead garage storage offers several advantages over purchasing ready-made units. Firstly, it allows for customization to perfectly match the specific dimensions and requirements of your garage space. DIY projects enable the incorporation of specialized features such as adjustable shelves, hanging rods, or integrated lighting, catering to your specific needs and preferences. Additionally, DIY overhead storage is often more cost-effective, as it eliminates the markups and shipping costs associated with pre-built units. Moreover, the satisfaction of completing a project from scratch and the potential for significant savings on materials can be highly rewarding for DIY enthusiasts.
Planning Your Overhead Garage Storage
Before embarking on the construction process, careful planning is essential to ensure the safety and functionality of your overhead garage storage. Start by measuring the available ceiling space and determining the maximum weight capacity your garage ceiling can support. Consider the types of items you plan to store, their weight, and their dimensions. Choose appropriate materials that can withstand the weight and ensure stability. For example, sturdy wood beams or metal framing with proper bracing are ideal for overhead storage construction. Also, consider the height and clearance needed for easy access and maneuvering within your garage. Remember to factor in the height of any existing fixtures or equipment, ensuring sufficient headroom. Finally, review local building codes and regulations to ensure your overhead storage project complies with safety standards.
Essential Steps for DIY Overhead Garage Storage
Once you have a detailed plan, you can begin constructing your DIY overhead storage unit. Here are essential steps to guide you through the process:
1. Prepare the Ceiling
Clean and prepare the ceiling surface by removing dirt, dust, and any loose paint or debris. Ensure the ceiling is structurally sound and can support the weight of the storage unit. You may want to install additional support beams if necessary, particularly for heavy items.
2. Construct the Frame
Build the frame of your storage unit using appropriately sized wood beams, metal framing, or a combination of both. Cut and assemble the framing pieces according to your plan, ensuring secure connections using strong screws, bolts, or brackets. Consider adding bracing for increased stability, especially for wider spans.
3. Install the Storage Components
Attach shelves, hanging rods, or other storage components to the frame you constructed. Use heavy-duty hardware to support the weight of your items. Consider using adjustable shelves to accommodate items of varying heights. If planning to store heavy items, use multiple supports and reinforce connections.
4. Secure the Unit to the Ceiling
Securely attach the completed storage unit to the ceiling using heavy-duty brackets, screws, or bolts designed for load-bearing applications. Ensure a strong and stable connection to prevent any accidental dislodgement or collapse. Follow the manufacturer's instructions for proper installation and weight limits.
5. Install Additional Features
Consider adding features like lighting, wheels for easier movement, or additional storage compartments to enhance functionality. Choose appropriate lighting fixtures that are compatible with your garage's electrical system and ensure safe operation. If utilizing wheels, ensure they are rated for the weight capacity of the storage unit.
6. Test and Load
After completing construction, carefully test the storage unit by gradually adding weight to it. Evaluate the stability and functionality of the unit under load. Ensure all components are properly secured and functioning as intended. Avoid overloading the unit beyond its weight capacity.
By following these steps and utilizing free DIY plans, you can create a functional and customized overhead storage solution for your garage. This DIY project not only provides enhanced storage capabilities but can also be a rewarding experience for those seeking practical solutions and creative home improvement projects.

Diy Garage Ceiling Storage And Wall Organization Angela Marie Made

Overhead Garage Storage Shelf Her Tool Belt

Diy Garage Ceiling Storage Shelves

How To Build Diy Garage Storage Shelves Crafted Work

Diy Garage Storage System Overhead Free Plan

Diy Garage Storage Ceiling Mounted Shelves Giveaway

How To Diy A Ceiling Garage Storage System The Family Handyman

Reclaim Your Garage W Diy Storage Shelves Free Plans

Diy Garage Ceiling Storage And Wall Organization Angela Marie Made

How To Build Diy Garage Storage Shelves Crafted Work
Related Posts


